How to use AWS SES email templates - Guide
Table of contents
- Introduction
- Setting up an AWS IAM user for Sovy
- Creating the first email template
- Connecting Sovy with the Amazon SES account
- Verifying AWS SES email identity
- Uploading email template to Amazon SES account
- Sending the first email using a template
- Leaving sandbox (optional)
- Importing existing templates from SES to Sovy
- Summary
Introduction
If you are here not by accident, you probably have one of these 2 problems:
You want to use AWS SES email templates but you don't know how.
You already use AWS SES email templates and you're looking for a better way to manage them.
After you read this post, you will know everything you need to seamlessly create, update, and delete your Amazon SES email templates. So now, let's focus for just a few more minutes and get right into it!
Setting up an AWS IAM user for Sovy
First, you need to create an IAM user for Sovy - the template manager - so it will have access to actually manage your templates, identities, and other SES settings. We precisely explained this whole process in a few steps in a separate article.
If you don't know how to set up an AWS IAM user to get the necessary credentials, or you're not sure what permissions policy you should select, I strongly recommend reading it: How to set up an AWS IAM user to use with Sovy - Guide
Creating the first email template
We're about to create an account on Sovy and configure access to our AWS account using the IAM User credentials we generated before. Start by visiting the Sovy sign-up page - https://sovy.app/auth/sign-up - where you can authenticate using your email and password or your Google account.
Once you're in, you will land on the empty template list.
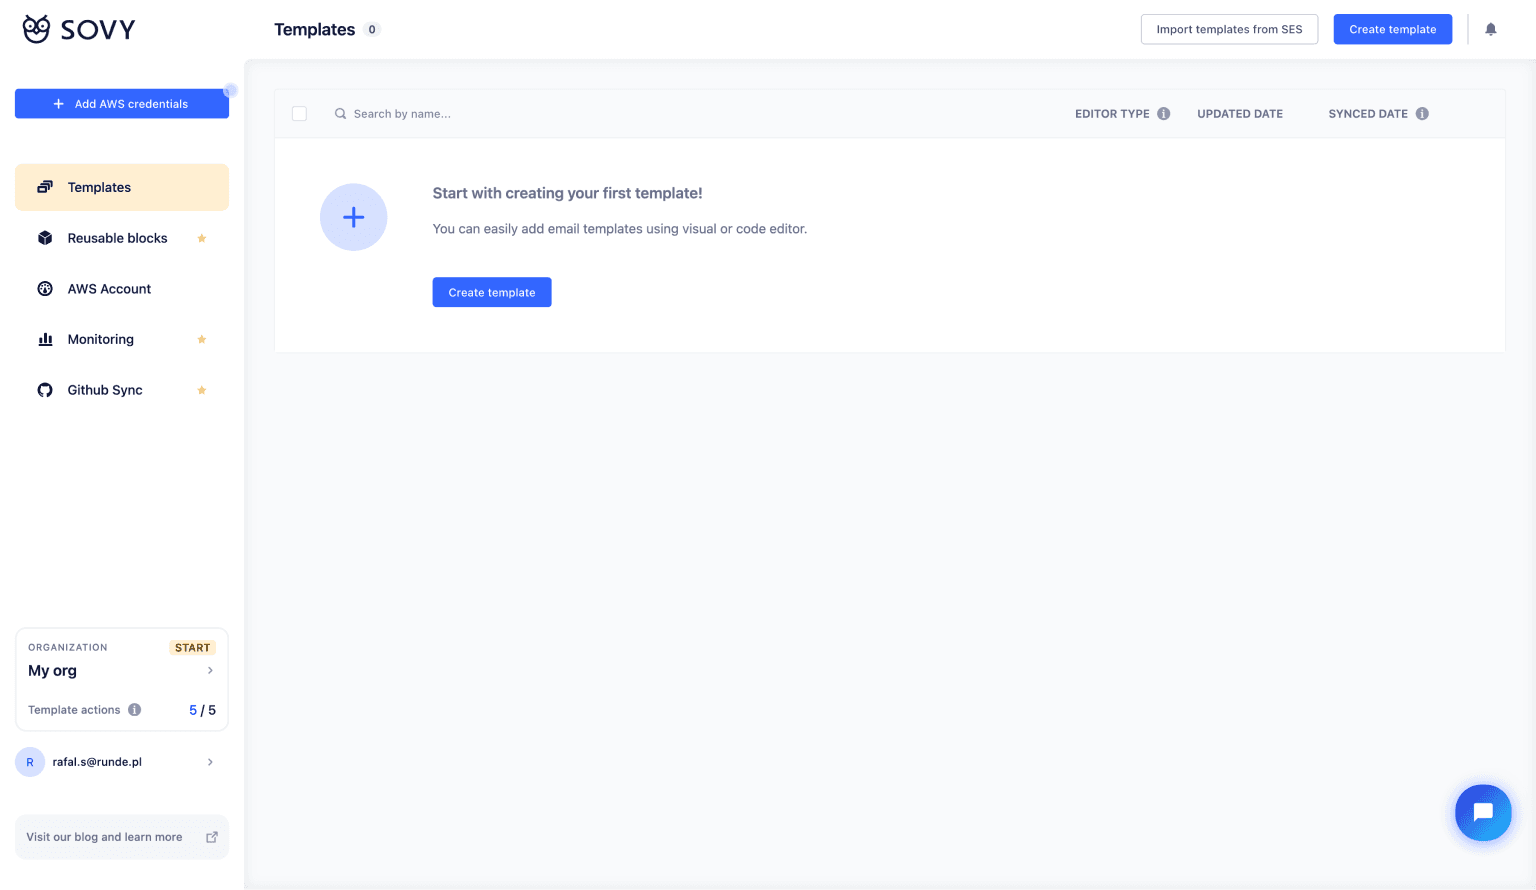
Let's create our first template just to test things out. Click the blue Create template button in the middle of the screen to open the dialog asking you to pick the editor type.
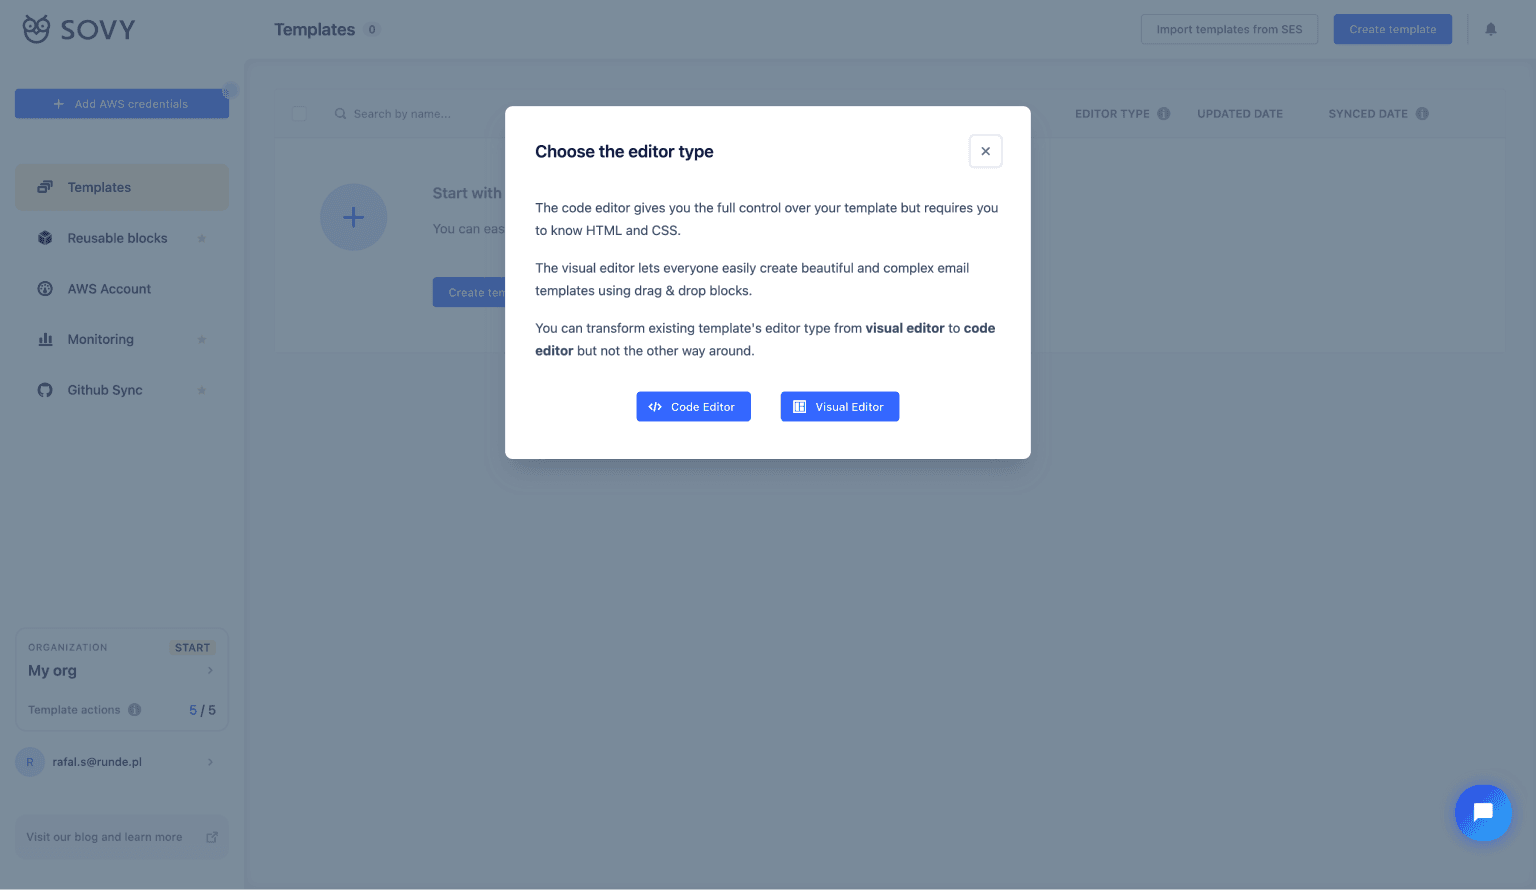
Code editor - full control, requires knowing HTML and CSS
Visual editor - drag and drop, easy to use, powerful editor
I will choose the code editor because I already have the HTML email template that I want to use. After clicking the Code editor button you will see the page with a template form.
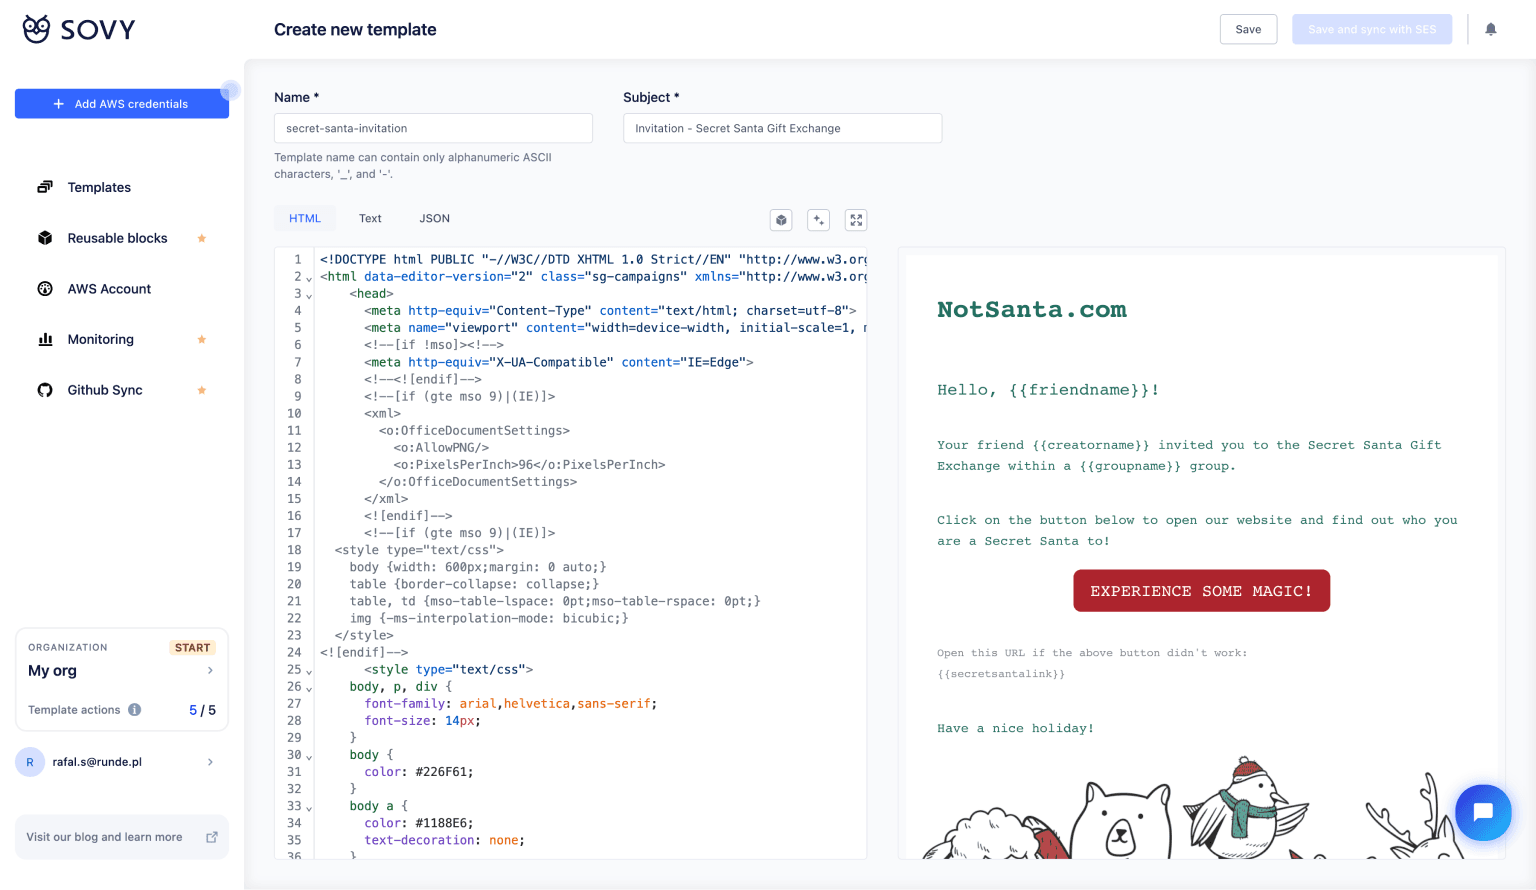
The form itself is very simple, yet gives you full control over your template. You can set up:
Template name
Email subject
Email HTML content
Email text content
You can also use the JSON tab to set some example data and test Handlebars tags in your template.
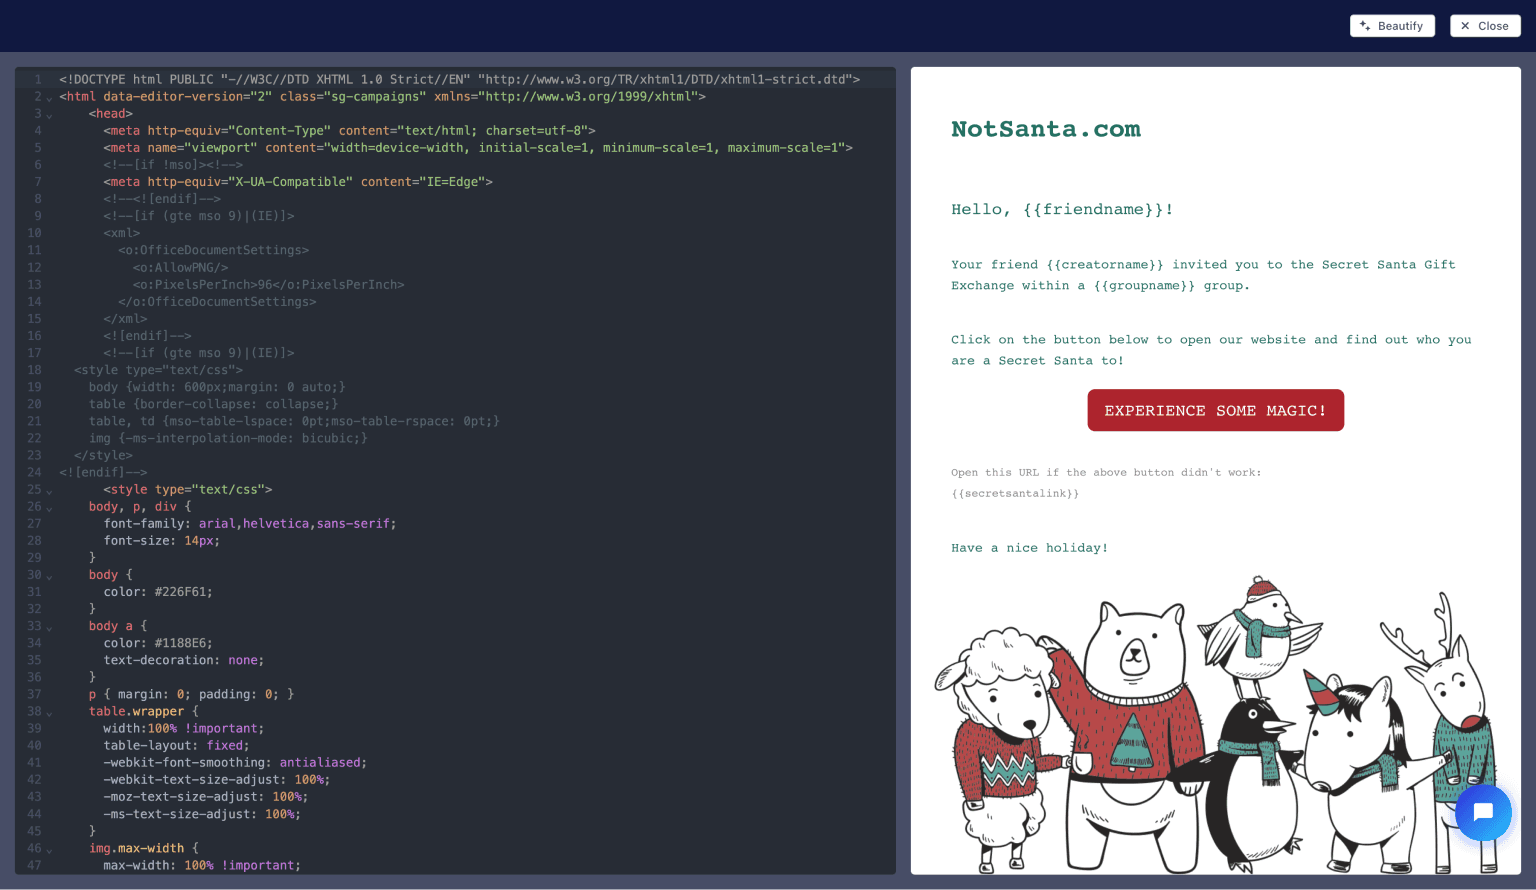
When you're editing the HTML content, you can use a special editor mode that expands the code editor and the preview to full screen, which makes editing your template even better.
After you're done editing your template just click the Save button in the top right corner. That's it, we just created our first email template but we still need to upload it to our Amazon SES account.
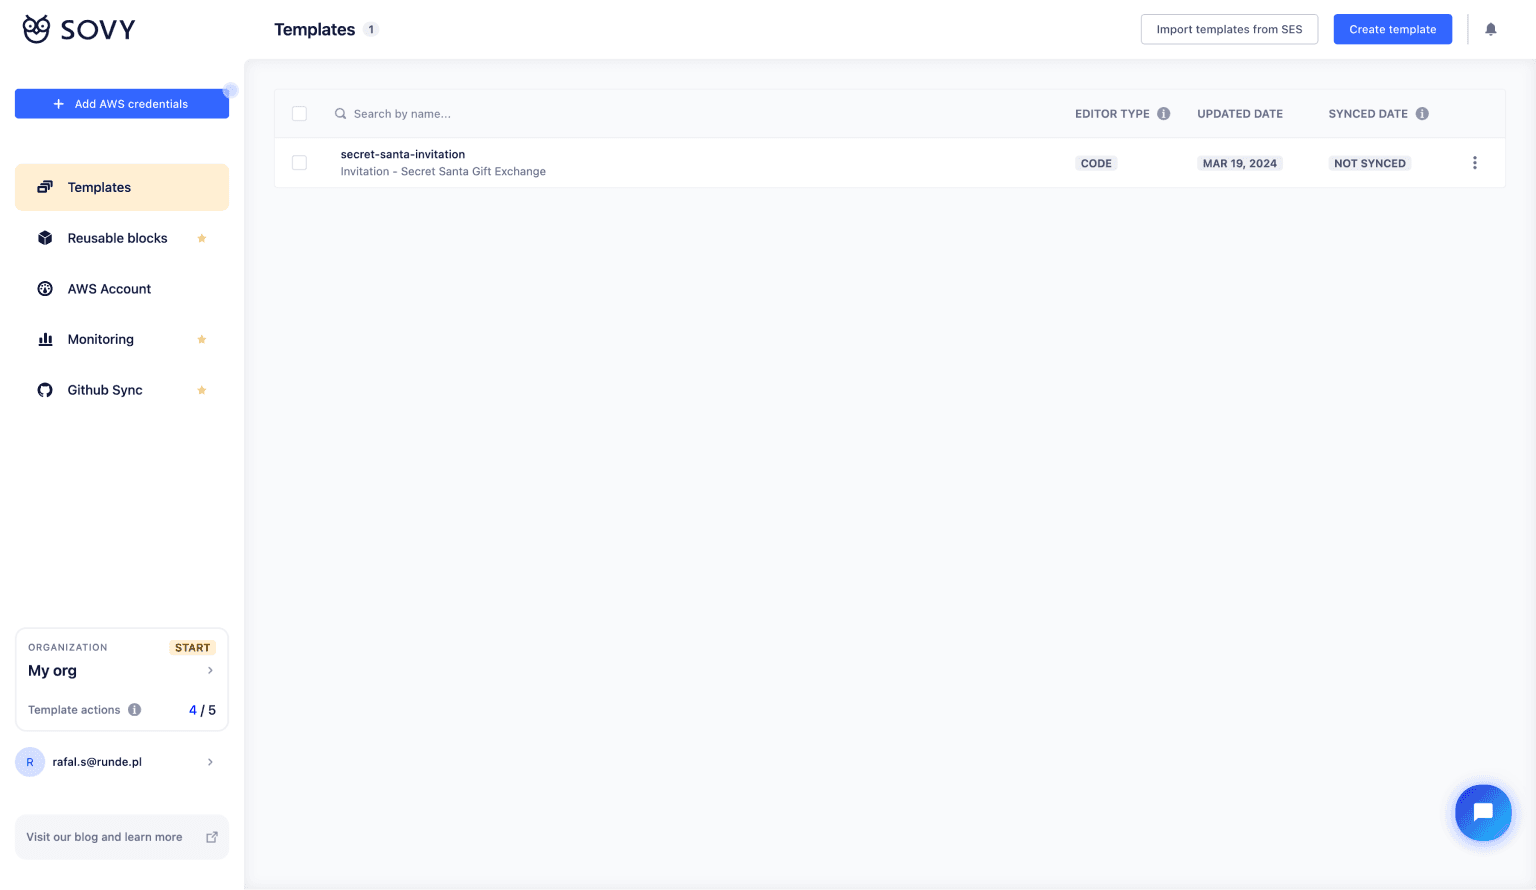
Right now you should see your template on the list but with NOT SYNCED label under the "Synced date" column. This is because the template has not been uploaded to SES yet.
Connecting Sovy with the Amazon SES account
To upload templates to our Amazon SES account we need to configure a connection between Sovy and AWS. Click the blue Add AWS credentials button in the top left corner to start this process.
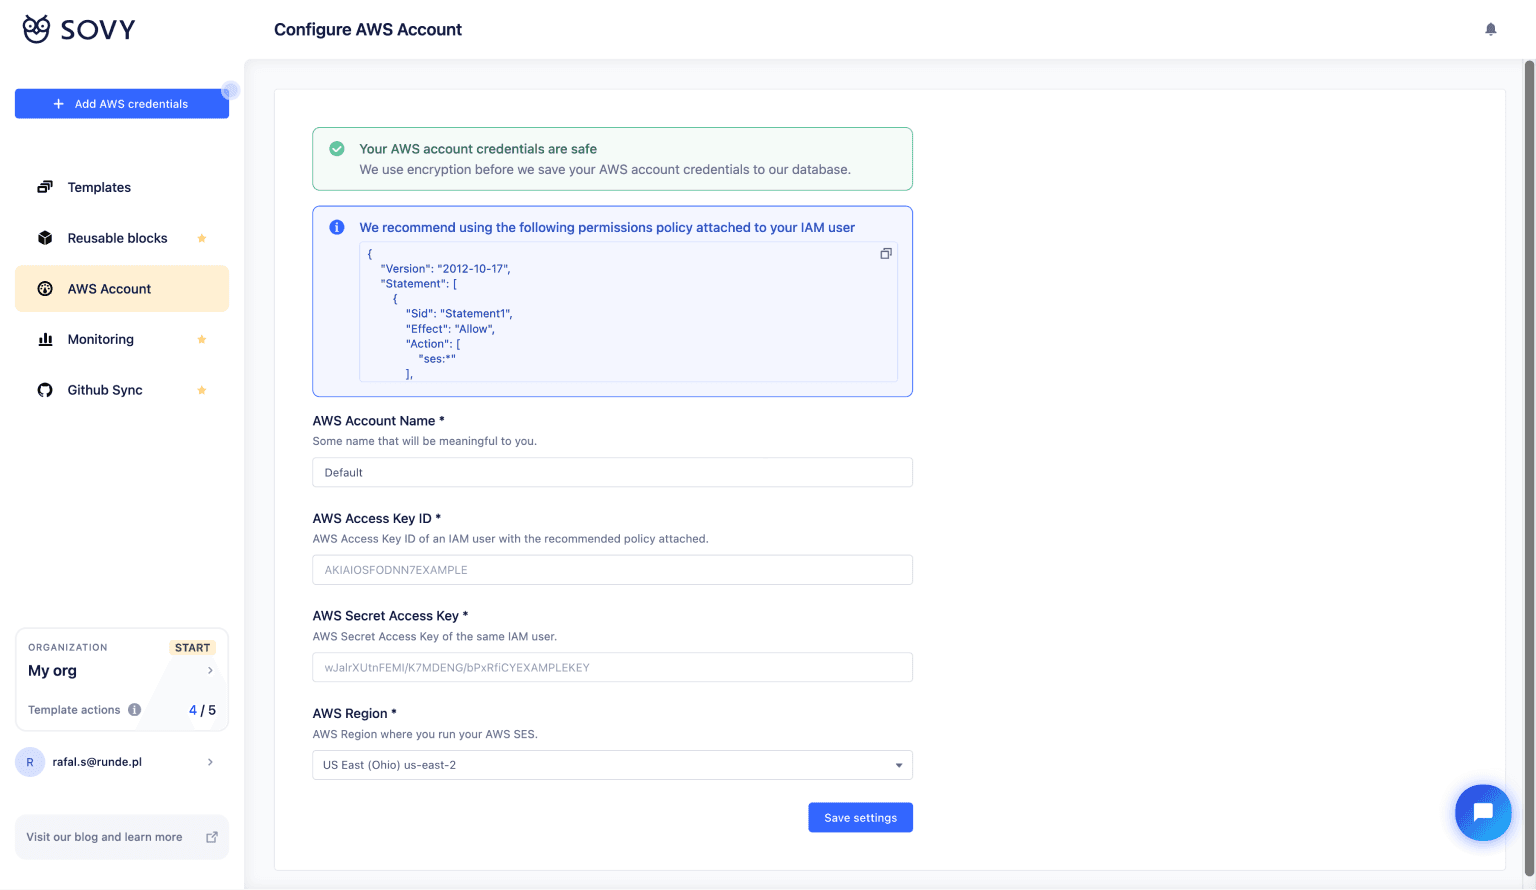
You will be asked for the AWS account credentials. Here you should enter the credentials of the IAM User we created earlier and select the AWS region that you're using. Click Save settings once you set everything up.
If the credentials you provided are valid and have the required permissions policy attached you should see a dashboard with some details about your AWS account and SES account status.
Verifying AWS SES email identity
If you haven't verified any email identities before, we will help you verify one now. You will need it for 2 reasons:
Addresses that you want to use as "From", "Source", "Sender", or "Return-Path" need to be verified.
If your Amazon SES account is still in the sandbox, you also need to verify any email addresses to which you plan on sending test emails.
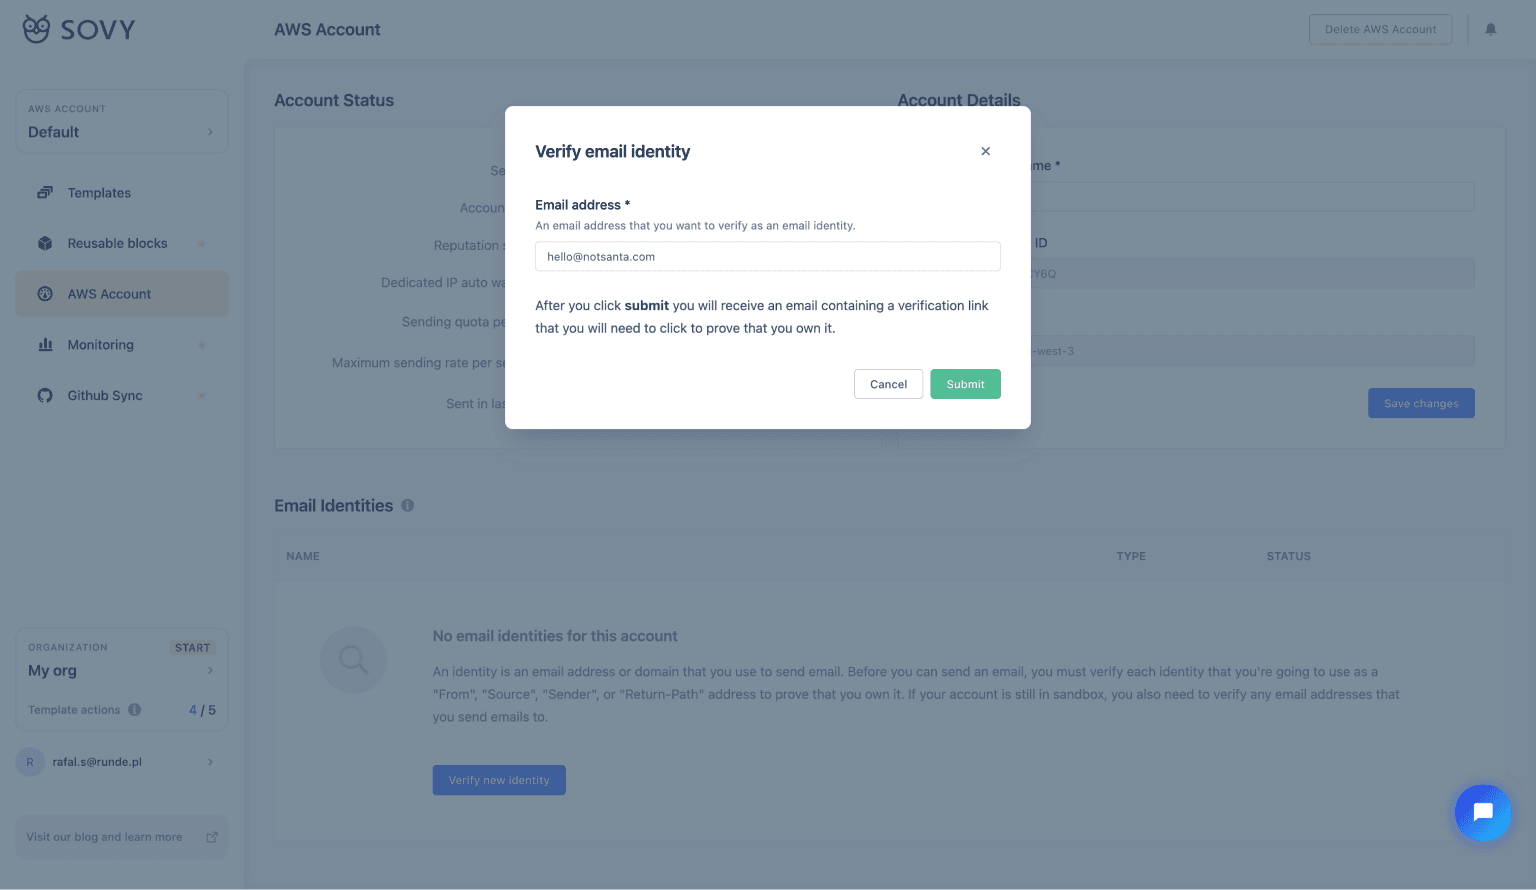
To verify an email address as an email identity you just need to click the Verify new identity button on the "AWS Account" page. A dialog will pop up where you can enter an email address you would like to verify in the empty field, submit the form, and click a verification link that you will find in an email that will be sent to it to prove that you own it.
Uploading email template to Amazon SES account
Now that we have a connection between Sovy and Amazon SES we can start uploading our email templates to SES.
Simply go to the template list, select all templates you'd like to upload to your SES account, and click the Sync with SES button that will appear in the top right corner.
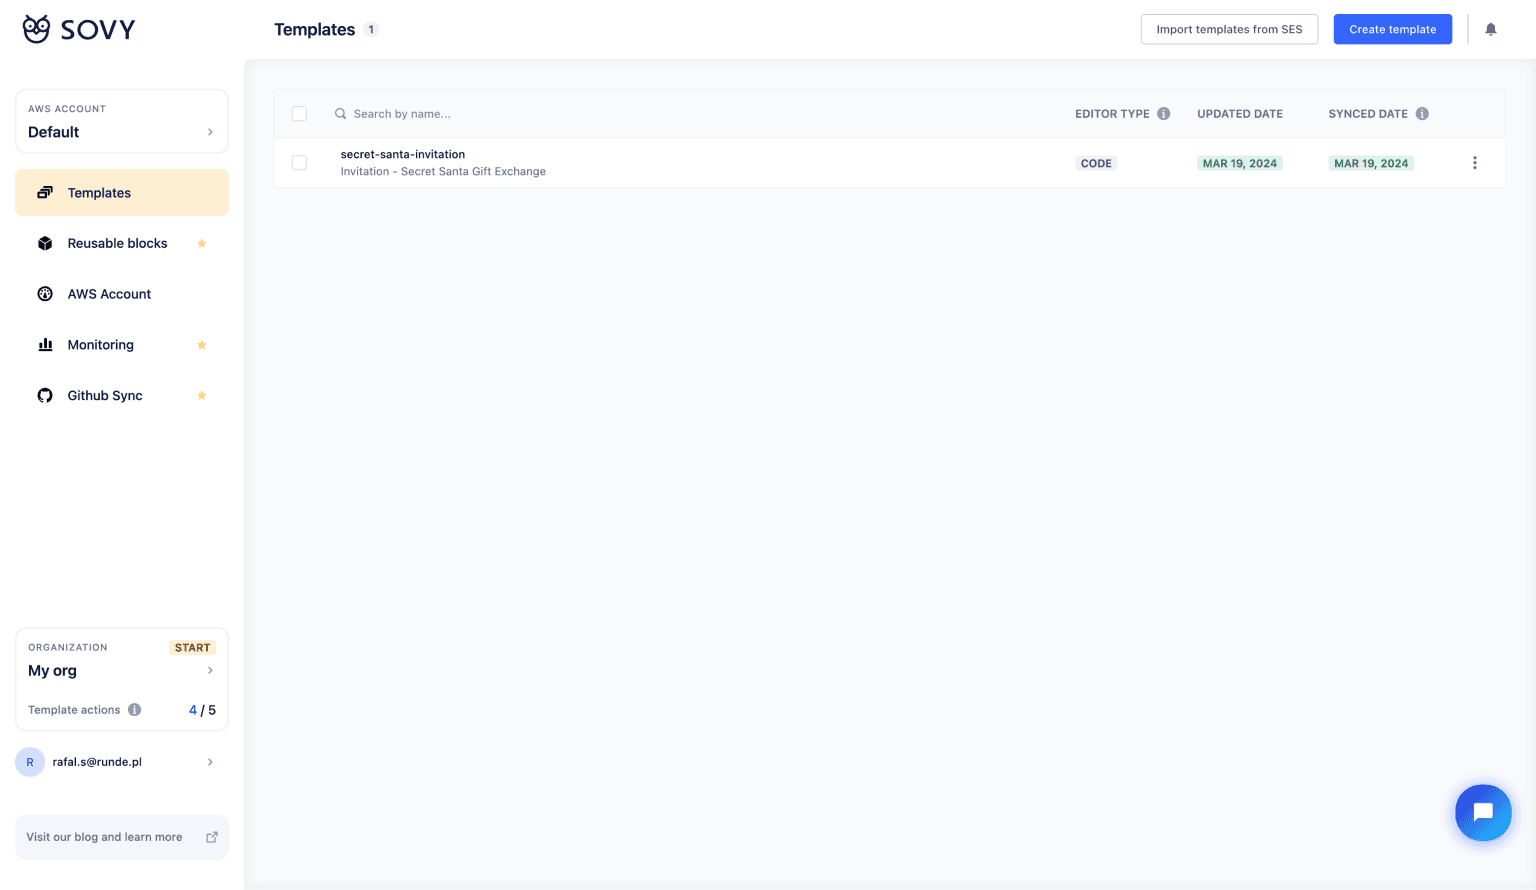
If everything goes well you should see the green label with a current date in the "Synced date" column of the templates table.
And that is all it takes. Just remember that any bulk action triggered on more than 3 templates will take a least few seconds and sometimes even minutes to finish. If you are trying to upload, or remove many templates at once you will need to wait for a while and refresh the page after some time to see the result.
Sending the first email using a template
I know that Amazon provides SDKs for many programming languages, but I'm going to use only TypeScript as an example. It shouldn't be very difficult to translate this into other languages.
Leaving sandbox (optional)
If you just started using Amazon SES, your account will be in Sandbox mode. This mode limits you with a small sending quota, but what's more important, it lets you send emails only to email addresses that are verified as email identities.
To leave the Sandbox mode, you can click the Leave Sandbox button that is placed inside the Account Status section on the "AWS Account" page. It will show you a simple form that you need to complete.
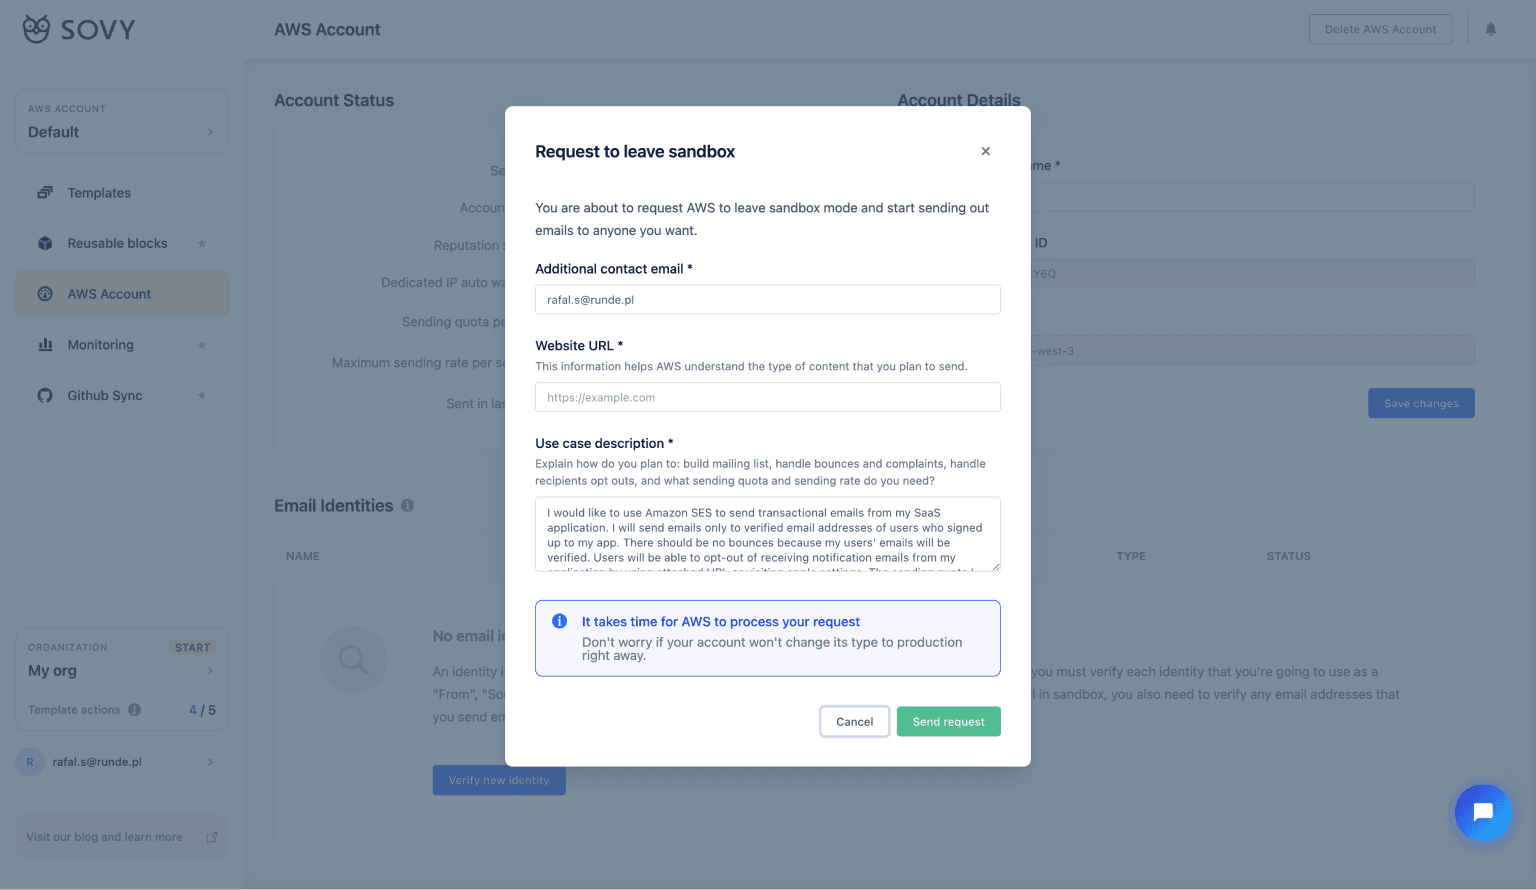
The most important is the Use case description field. We prefilled it with some placeholder text to give you an idea how should it look like. You should change it so it precisely describes your email-sending processes and procedures, like how often you send emails, how you maintain your recipient lists, and how you manage bounces, complaints, and unsubscribe requests.
After you send the form, you usually need to wait a few hours, up to a few days, for AWS to reply. They will either accept your request and upgrade your account or ask for some more details - CHECK YOUR MAILBOX!
Importing existing templates from SES to Sovy
If you already have some email templates in your Amazon SES account, that you would like to update using Sovy editor or just remove them, you can use the importing feature.
Go to the templates list and click the Import templates from SES button in the top bar. It will take you to a page with a list of all already existing email templates in your SES account.
Now you can select any templates you'd like to have in Sovy and click the Start import button in the top right corner to start the importing process.
Remember that any bulk action triggered on more than 3 templates will take a least few seconds and sometimes even minutes to finish. If you are trying to import, or upload many templates at once you will need to wait and refresh the page after some time to see the result.
Summary
Well done! Now you know how to deal with SES email templates and have all the tooling you need. If you think something is missing from this guide or something is not clear, please let me know at rafal@runde.pl.